

How To Take A Screenshot In Laptop Windows 7
Knowing how to take screenshots on a laptop is very handy, and thankfully, both Windows and macOS laptops have a built-in screenshot characteristic you lot can use. While the integrated tools get the basics right, tertiary-party screen capture and screencasting utilities are a much better option for advanced users.
Permit'due south explore how to take a screenshot on laptops running Windows 10 and macOS, using either the official tools readily available to you or via an advanced third-political party app.
How to Take a Screenshot on a Windows 10 Laptop
Windows 10 offers multiple means to take screenshots. In that location are at least three methods built into the operating system, alongside 3rd-political party screen capture apps with more advanced features. Here's how to take screenshots on a Windows 10 laptop.
1. Take Screenshots Using the Impress Screen Central
If you want to capture a full screenshot, the dedicated Print Screen key on your laptop is the all-time option. It is also available on external keyboards if yous have one connected to your laptop.
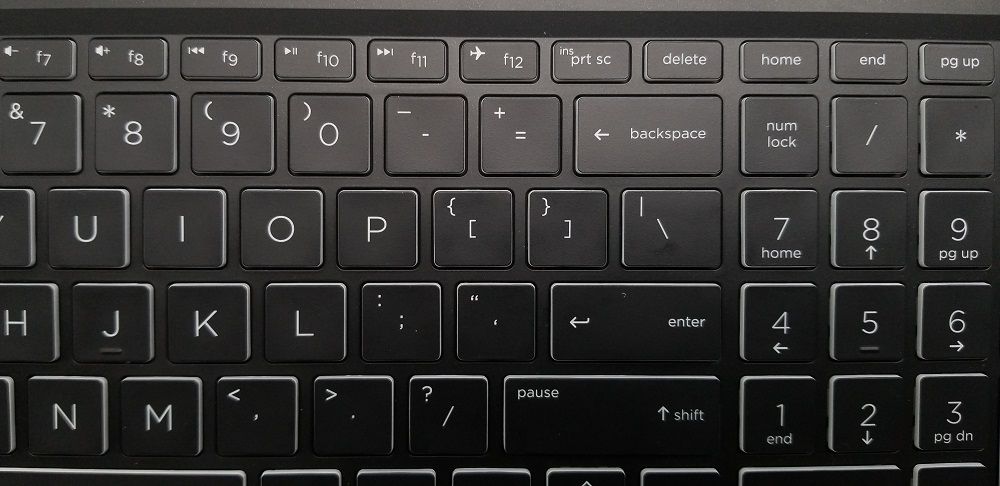
- To capture a screenshot, press the Print Screen fundamental on your laptop'south keyboard. There'southward a expert chance that the fundamental doesn't take "Print Screen" written out on it fully, so expect for one that says "PS," "PrntScrn" or "PrtSc" if yous can't find it.
- When you press the Impress Screen key, a screenshot is saved to your clipboard. You can paste the screenshot in the Paint or 3rd-political party prototype editing app and modify it accordingly.
- To straight save a screenshot as a file, pressWindows key + Impress Screen. You will run into the screen dim for a 2nd, which ways your screenshot is captured and saved.
- All the captured screenshots are saved to the following location by default:
C:\Users\UserName\Pictures\Screenshots
Based on your laptop manufacturer, you lot may take to try unlike central combinations to capture the screenshot as a file. Refer to your computer's user guide for more data.
If y'all don't see your screen dim, make sure the Animate windows when minimizing and maximizing option is enabled in Advanced Options.
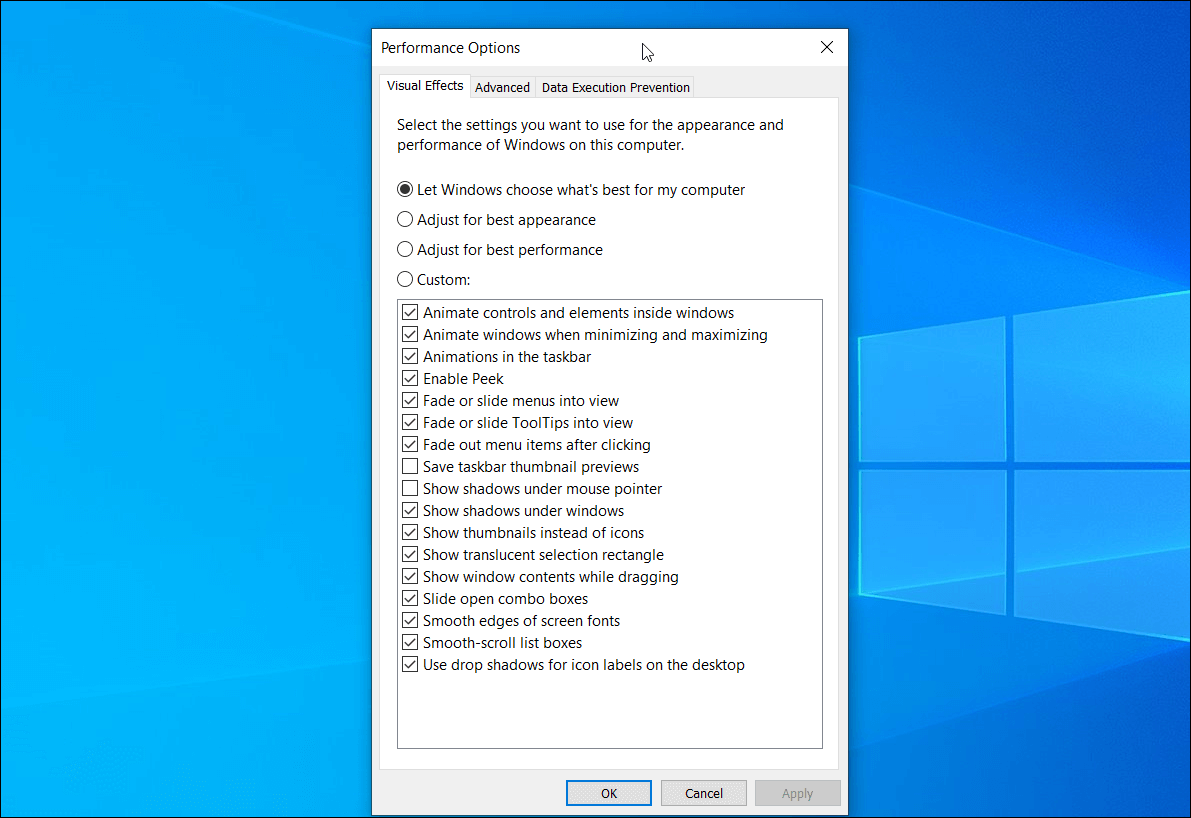
You lot can access it from Settings > Organisation > About > Avant-garde organisation settings. Open the Avant-garde tab and choose Settings under the Performance section.
If you are using a dual-monitor setup, the impress screen function will capture every active screen. To capture but the active window, click on the title bar of the window you want to capture and press Alt + Impress Screen.
ii. Have a Screenshot Using Windows 10's Snipping Tool
Is your dedicated Impress Screen key not working? Don't fret, considering you can take screenshots without Print Screen on Windows. Microsoft Windows 7 and the later versions of the OS come with Snipping Tool—a built-in screenshot utility to capture custom areas or active windows. Here's how to use information technology.
- Open the Windows search bar, blazon snipping tool, and hit enter to launch the app.
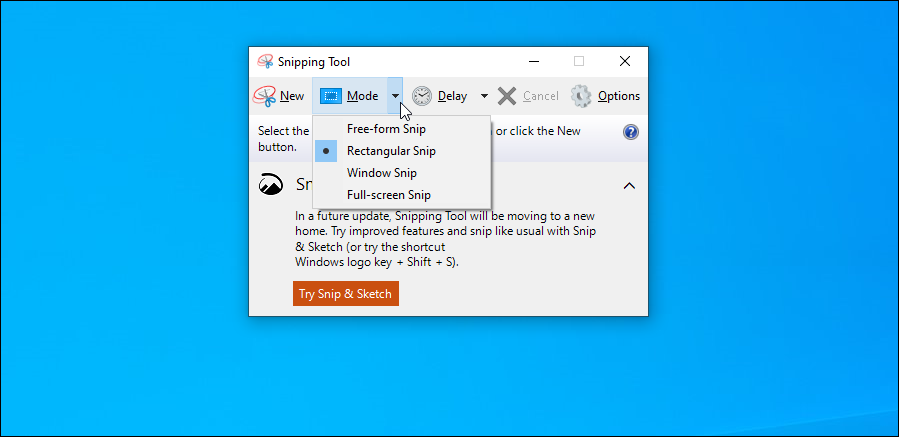
- Click the New button to capture a new screenshot. Drag the crosshair to select the area you want to capture.
- You can edit the screengrab by highlighting text or putter using the pen tool.
- For more snip options, click the Mode button. Choose from Gratuitous-class to snap a specific area or the Window pick to capture active windows.
- Additionally, you can filibuster the shutter speed when taking screenshots from i to v seconds.
iii. Capture a Screenshot Using the Snip & Sketch Tool
If you lot are running Windows ten October 2018 Update or to a higher place, you can utilise the new Snip & Sketch tool. Compared to the Snipping Tool, it has some useful new features.
To capture screenshots using Snip & Sketch:
- Type Snip and Sketchin the Windows search bar, and open the app.
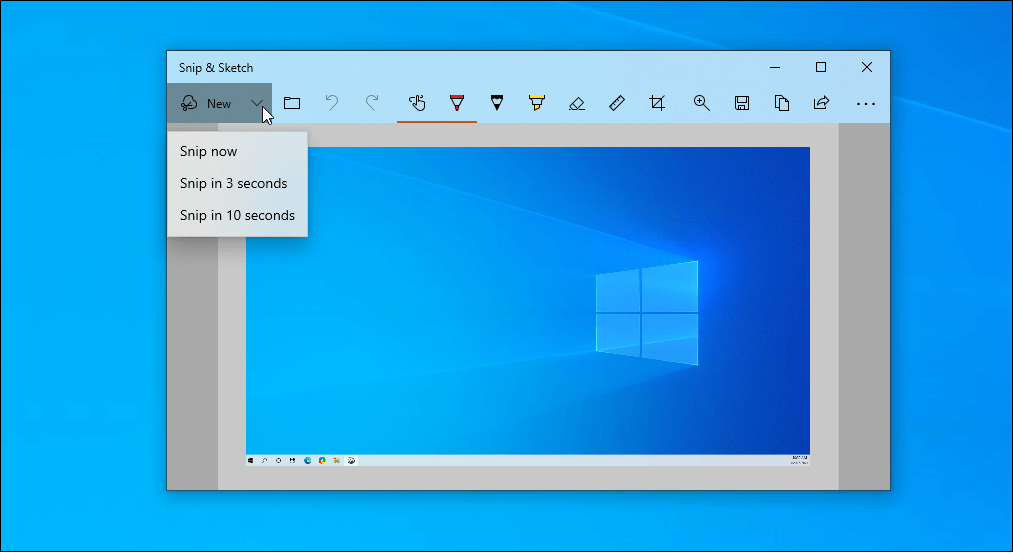
- Click the New button. Your screen will dim for a moment, and a toolbar will appear on top. Y'all can choose from theRectangular, Free-form, Window, and Full-Screen Snip options.
- For delayed snips, click the down-pointer button side by side to the New option and select Snip in iii seconds or Snip in 10 seconds.
- To customize the screenshot, y'all can use a highlighter, a ball pen with different colors, a roller for directly lines, or a cropping tool to reduce the prototype. If you mess upwards, utilize the eraser to scrub away your mistakes.
- Press the Windows key + S to save the image.
Alternatively, you tin can also access the Snip & Sketch tool withWindows primal + Shift + S to have quick screenshots and salvage them automatically. All the screenshots are saved in the This PC > Pictures folder.
four. Use the Built-In Windows 10 Game Bar
Windows ten at present ships with the Xbox Game Bar. This bar offers quick access to screen capture and sharing features aimed at PC gamers. However, you tin can use it for capturing regular screenshots in Windows 10 laptops too.
To take screenshots with the Game Bar tool:
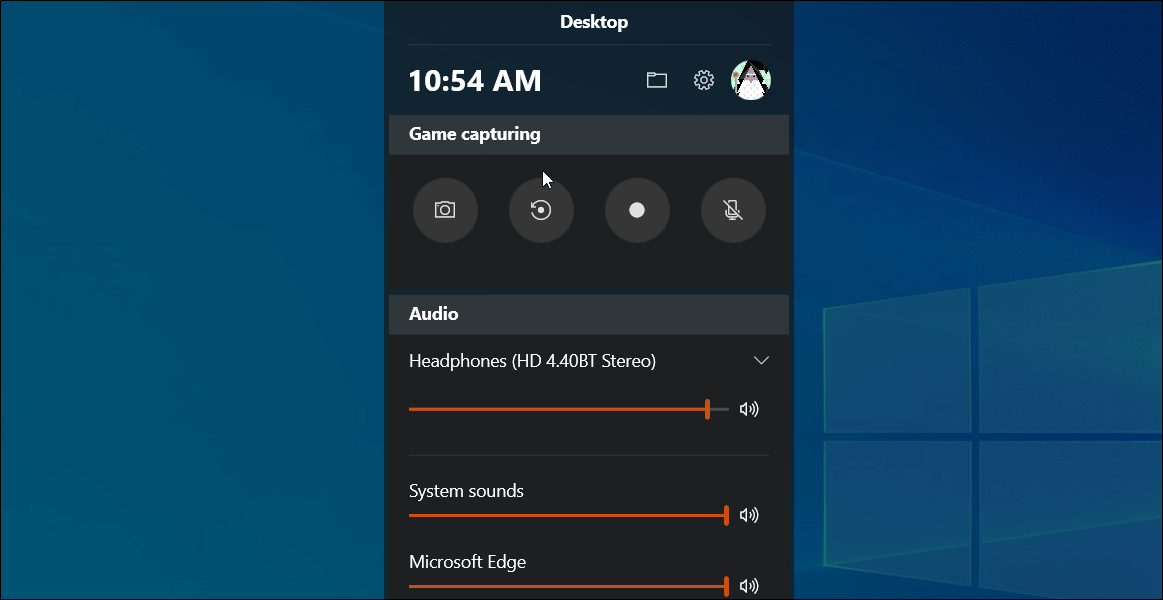
- Press the Windows key + G on your keyboard to launch the Game Bar app.
- Click the Photographic camera icon. Game Bar will capture the screenshot and relieve it automatically. It will capture the currently active window automatically, then ensure you have the correct window selected.
The Game Bar screenshot feature is pretty basic but works well for what it's worth. Information technology'southward been designed to piece of work with games, and that shows in its functionality.
Go to Start > Settings > Gaming > Xbox Game Bar to customize the keyboard shortcut and everything else.
5. Use ShareX to Have Professional Screenshots Using Advanced Features
The rudimentary Windows 10 screen capture apps can practice basic jobs very well. However, if you want advanced features, ShareX is the best costless screenshot tool available for Windows ten.
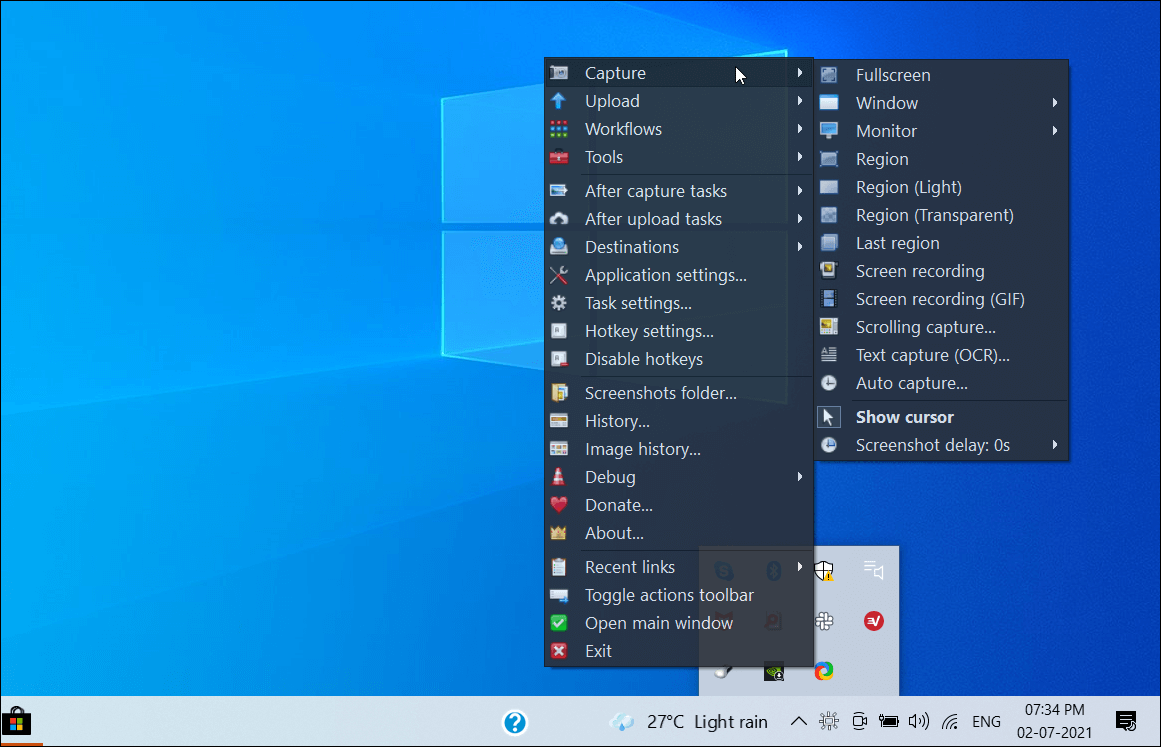
With ShareX, you can take screenshots, comment them on the fly, record the screen, create GIFs, and choose from multiple capture methods. And we haven't even touched on the range of later on-capture features, including annotations, blur, border customization, etc.
ShareX is an excellent utility if you demand powerful screenshot software that does more than capture screenshots. It is feature-packed, and higher up all, gratuitous to employ.
Download: ShareX for Windows (Costless)
How to Take a Screenshot on a MacBook or macOS
macOS has its fair share of ways to take a screenshot on a MacBook. With the release of macOS Mojave, there is a born screenshot tool, like to what we accept seen with Windows OS, finally!
1. Accept Screenshot With the Screenshot Tool
macOS Mojave and newer versions feature a built-in screenshot tool. To open information technology, navigate to Launchpad > Other > Screenshot or use the Shift + Command + 5 shortcut. Here's how to use it.
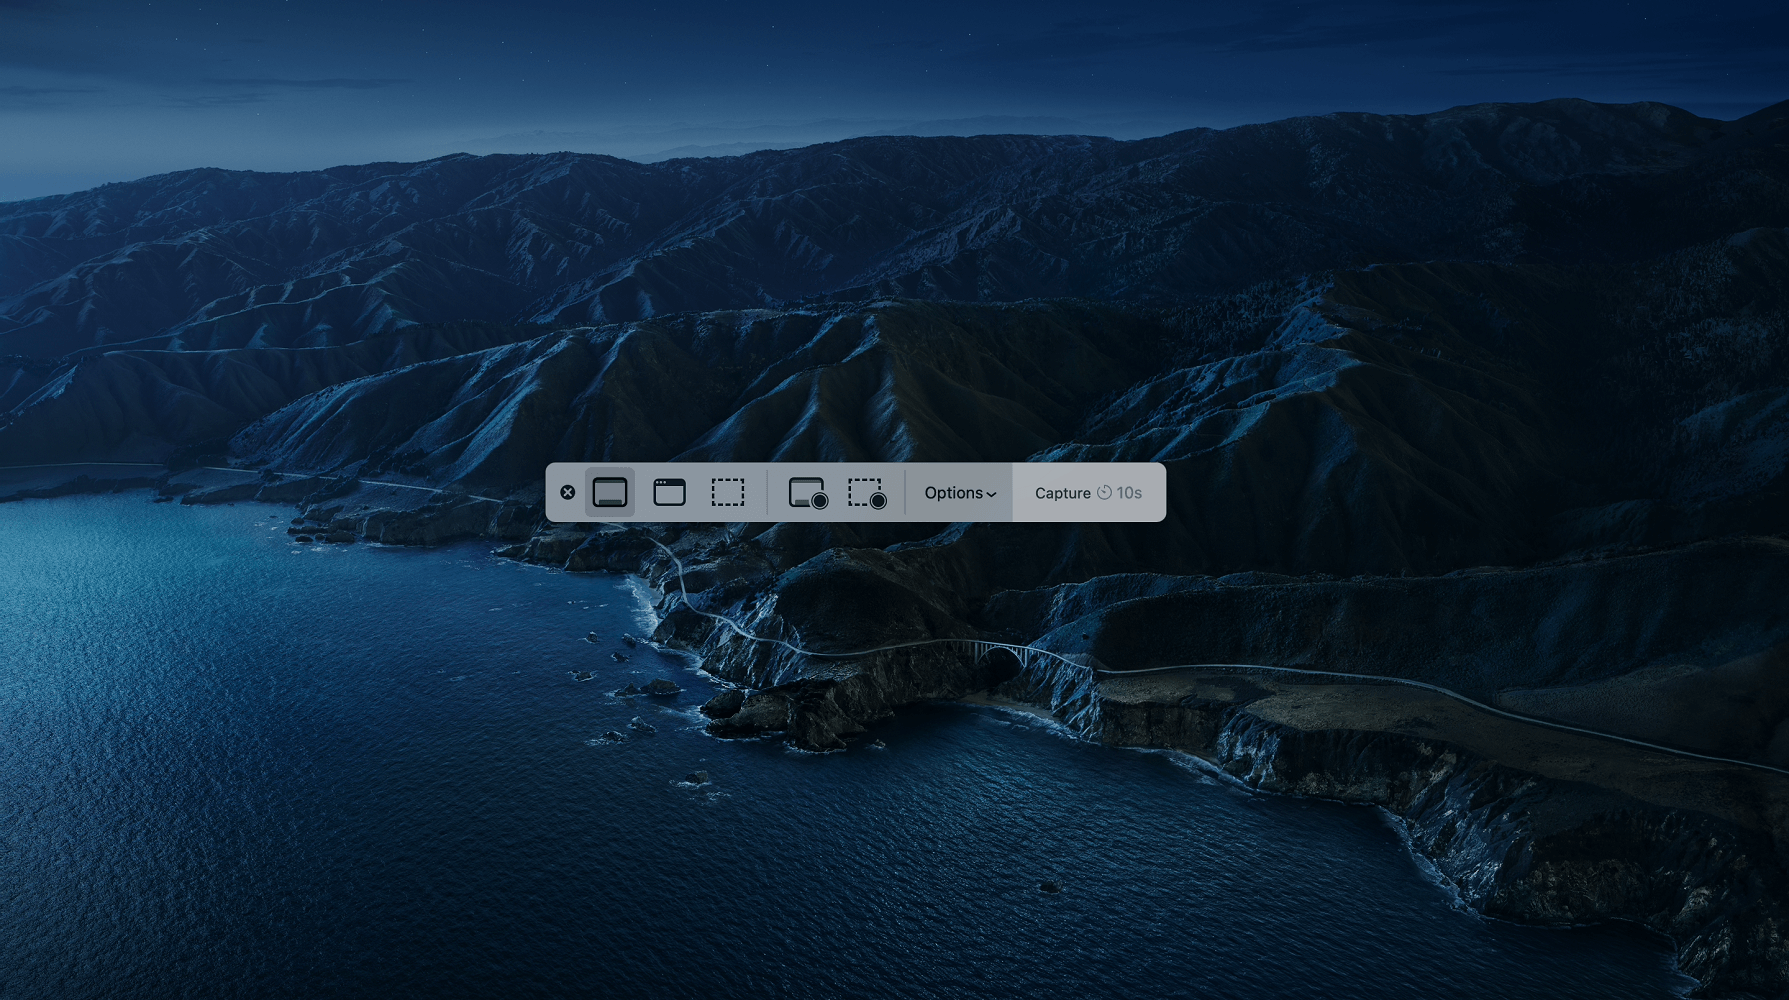
- Press the Shift + Command + v to launch the Screenshot tool. A floating toolbar will appear with a few options.
- You can grab the unabridged screen, custom area, active window, and more.
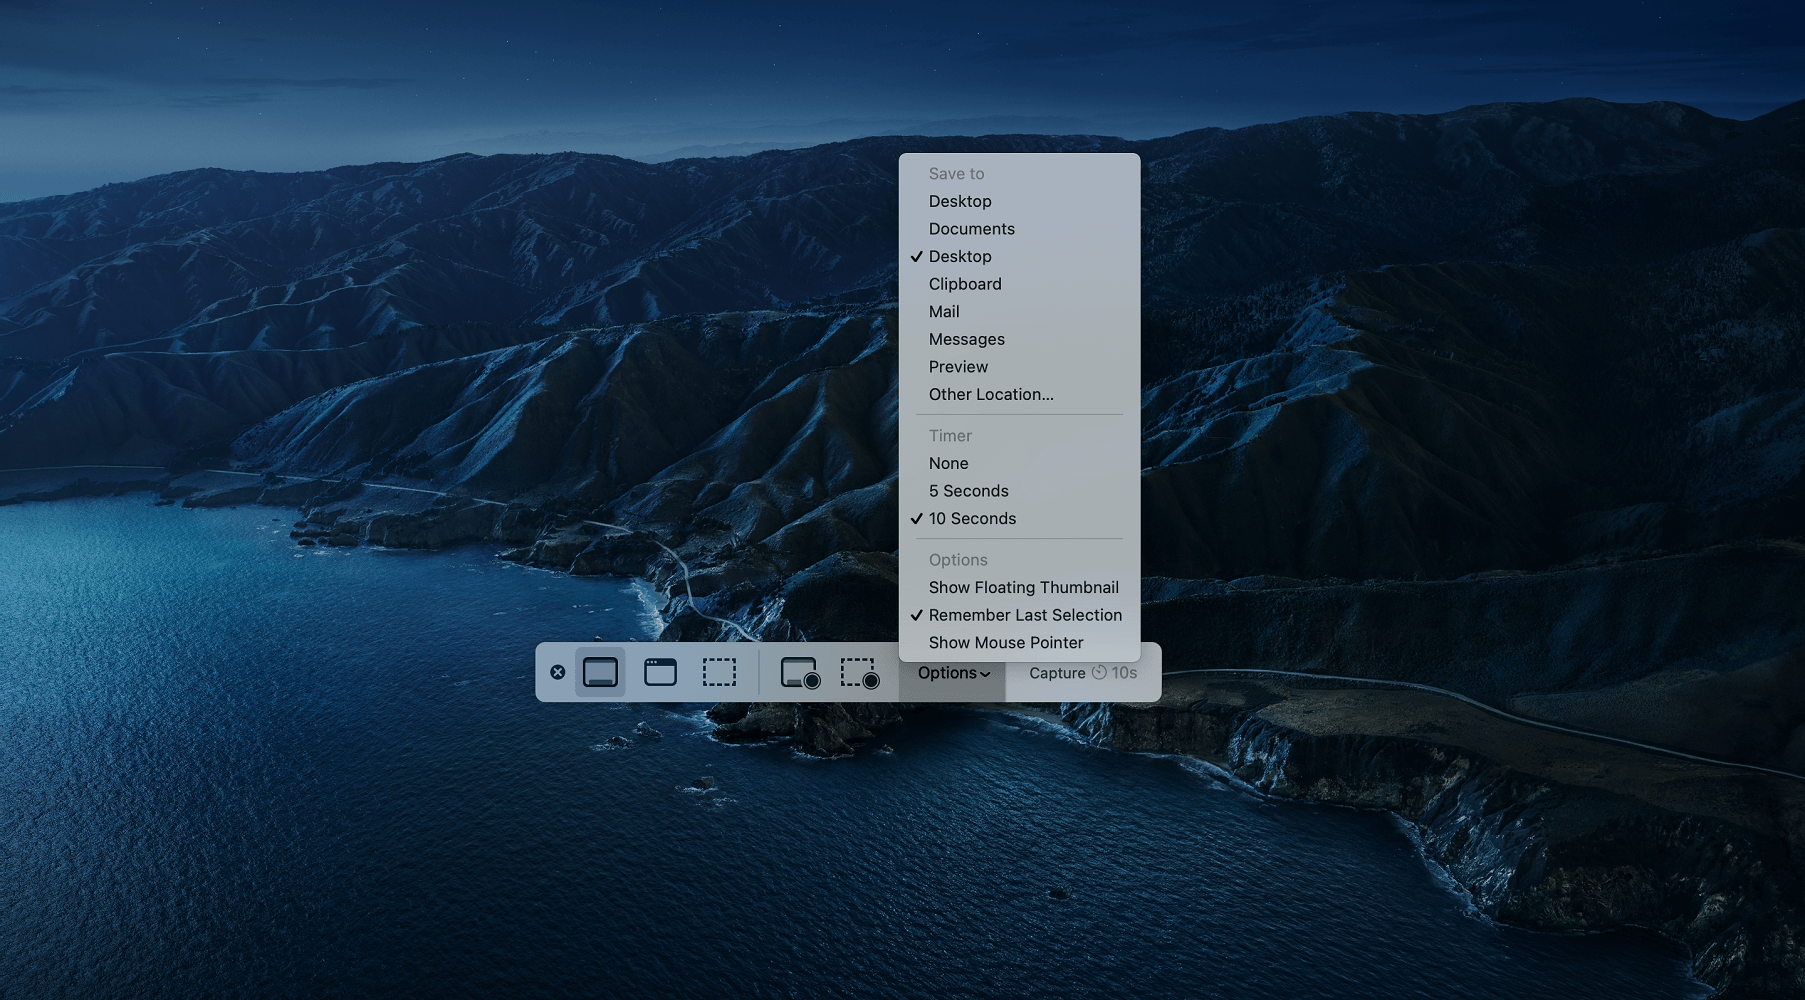
- There is a delay characteristic that you tin can access by clicking on Options. It will bring up options such as choosing where your Mac screenshots are saved. Past default, the screenshots are saved to your desktop.
This tool too offers a screen recording office. Launch the tool, cull Record entire Screen or Selected Portion, and drag the crosshair to select the area. When you lot are ready, click the Record button to showtime screen recording on your MacBook.
two. Use the Shift + Command Shortcut to Take Screenshots on a Mac
macOS comes with pre-defined shortcuts to capture an entire screen, custom area, and active window. It is useful for capturing quick screenshots without launching the Screenshot tool.
To capture screenshots using shortcuts on a MacBook:
- Press theShift + Command + 3 keys on your keyboard to capture your unabridged screen. You will run across a thumbnail in the corner of your screen. You tin edit the screenshot or wait for it to relieve to your desktop.
- Printing Shift + Command + four to capture a portion of the screen. Drag the crosshair to select the expanse to capture.
- Alternatively, printing Shift + Control + 4 + Space bar. A photographic camera icon will popular upwardly. Select the window that you want to capture and then click the camera icon.
If you want to send the screenshots to your clipboard, use the Control cardinal in combination. For example, to capture a custom area, printing the Shift + Command + Control + 4, capture a screenshot and it will be saved to your clipboard.
three. Apply Snagit Screen Capture and Recording for Mac
Snagit is a powerful screen capture and recording software by Techsmith, developers of Camtasia Studio. It is a premium software to rapidly capture your screen, add boosted context with annotations, text, and more.
Snagit supports multiple capturing methods for both screenshots and screen recording. In add-on, you can edit videos with text, annotations, and templates for visual instructions.
Unfortunately, Snagit doesn't come up free. If yous don't want to splurge on a screen capture tool just yet, at that place are some first-class gratuitous alternatives for Mac including Snappy, LightShot, and Skitch.
Download: Snagit for Mac (Costless trial/$49.99)
That'southward How You Take a Screenshot on a Laptop
Screenshots are handy for sharing an fault screen with tech back up, sharing your new notice on social media, or even celebrating a milestone with friends or family. At present you know the best screenshotting tools available, regardless of if you lot prefer Windows or macOS.
That said, if yous are not a fan of installing apps for everything, online screenshot tools are effective alternatives that are getting amend every day.
About The Writer

Source: https://www.makeuseof.com/how-to-take-a-screenshot-laptop/
Posted by: thompsonprien1967.blogspot.com
0 Response to "How To Take A Screenshot In Laptop Windows 7"
Post a Comment